Sonar has a rich API that allows you to automate any action you can take within the application. It also offers comprehensive webhooks that allow external tools to be triggered when specific events occur.
There are many ways to leverage the API and webhooks, and one way that can make this very easy is by using a third party tool like tray.io.
The Tray platform enables users to integrate apps and automate processes using preferred languages and tools with an easy-to-use, low-code builder that lets you build API integrations with a simple drag-and-drop interface.
Building automated workflows in tray.io
After logging into tray.io, click Add Workflow and fill in a name.
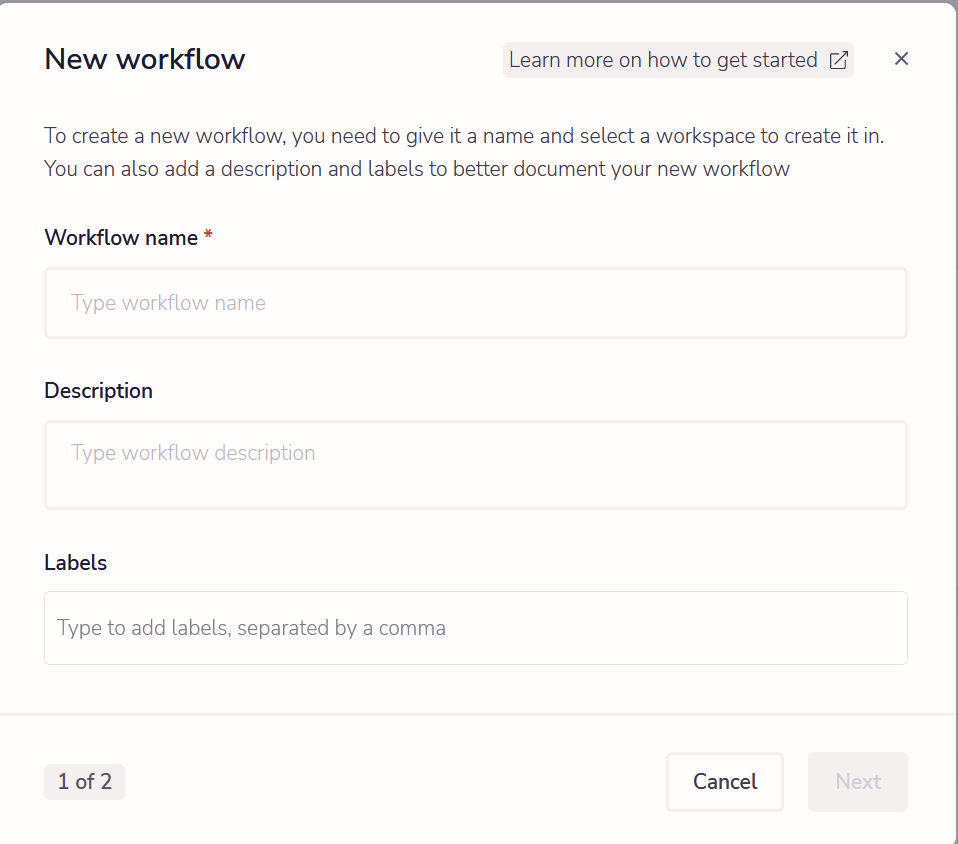
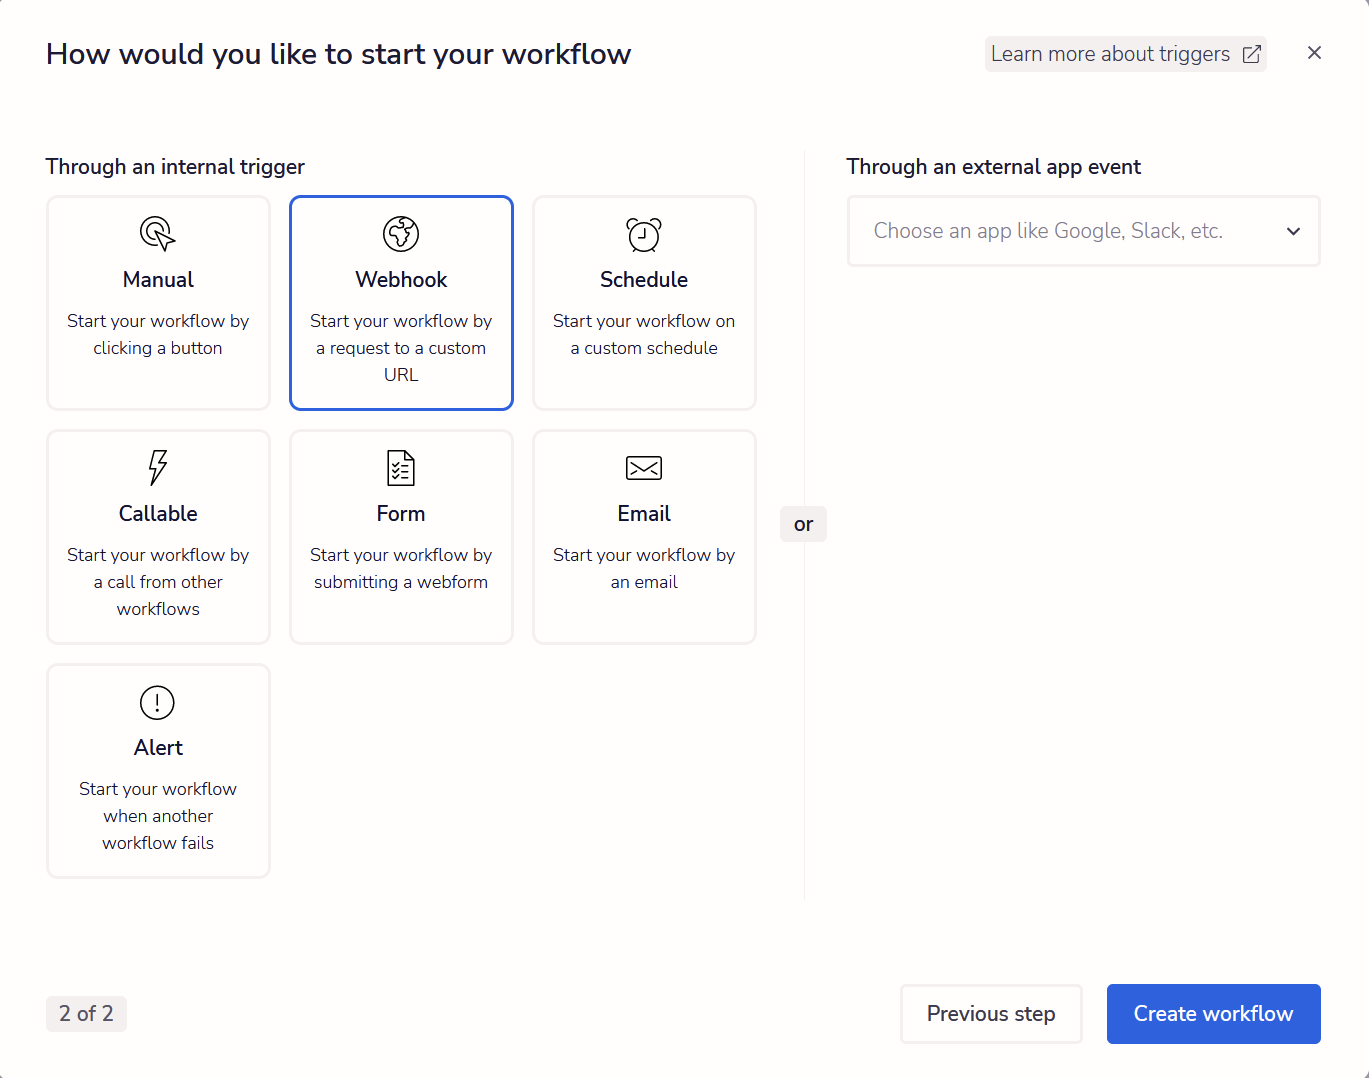
Next, you’ll be asked how you want to trigger the workflow. For this example, we’ll select Webhook, as we’ll be triggering the workflow via a Sonar webhook.
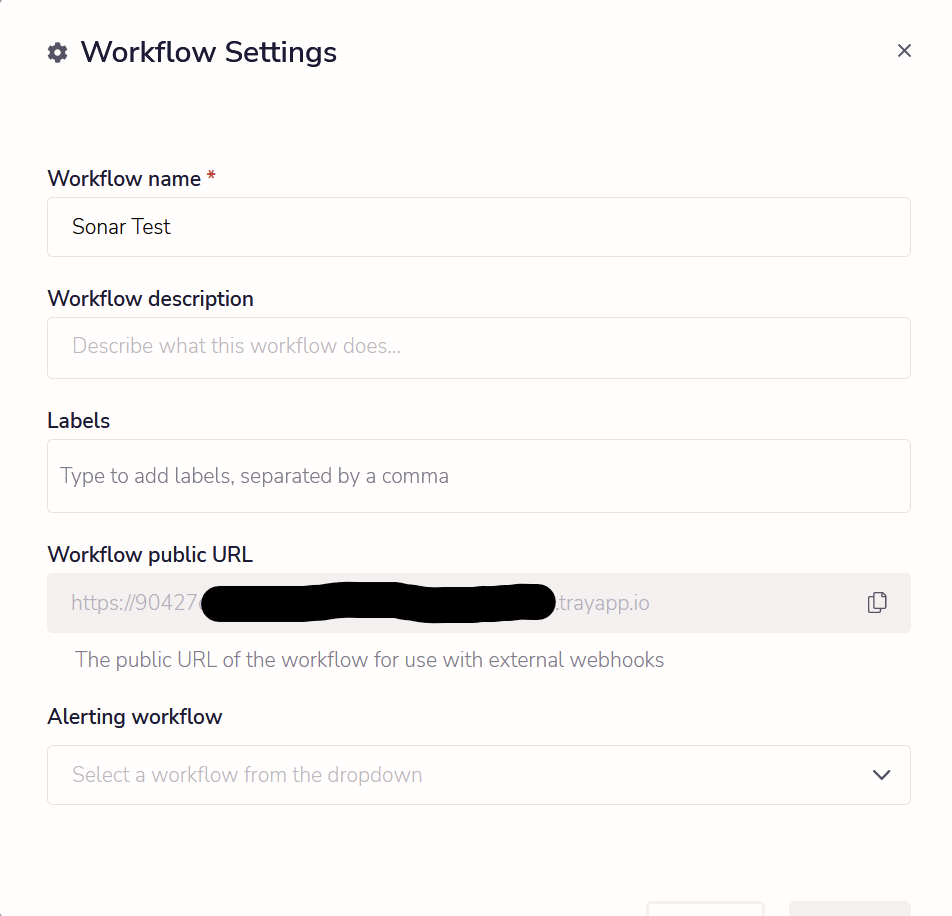
After creating this new workflow, you’ll see the workflow design tool in tray.io. This allows you to easily customize the actions that are taken when a webhook is received. First, let’s setup the webhook in Sonar to deliver data to tray.io. Click the three dots icon at the top right of the screen, navigate to Settings, and copy the Workflow public URL from the settings box.
Now, inside your Sonar instance, navigate to Settings, then Integrations and finally Webhook Endpoints. Create a new webhook endpoint and enter the public URL from tray.io into the URL field. For the purpose of this tutorial, we’re going to select Debits as our event type, and Create as the specific event to trigger the webhook on, but Sonar provides webhooks for every type of entity in the application, so the sky is the limit!
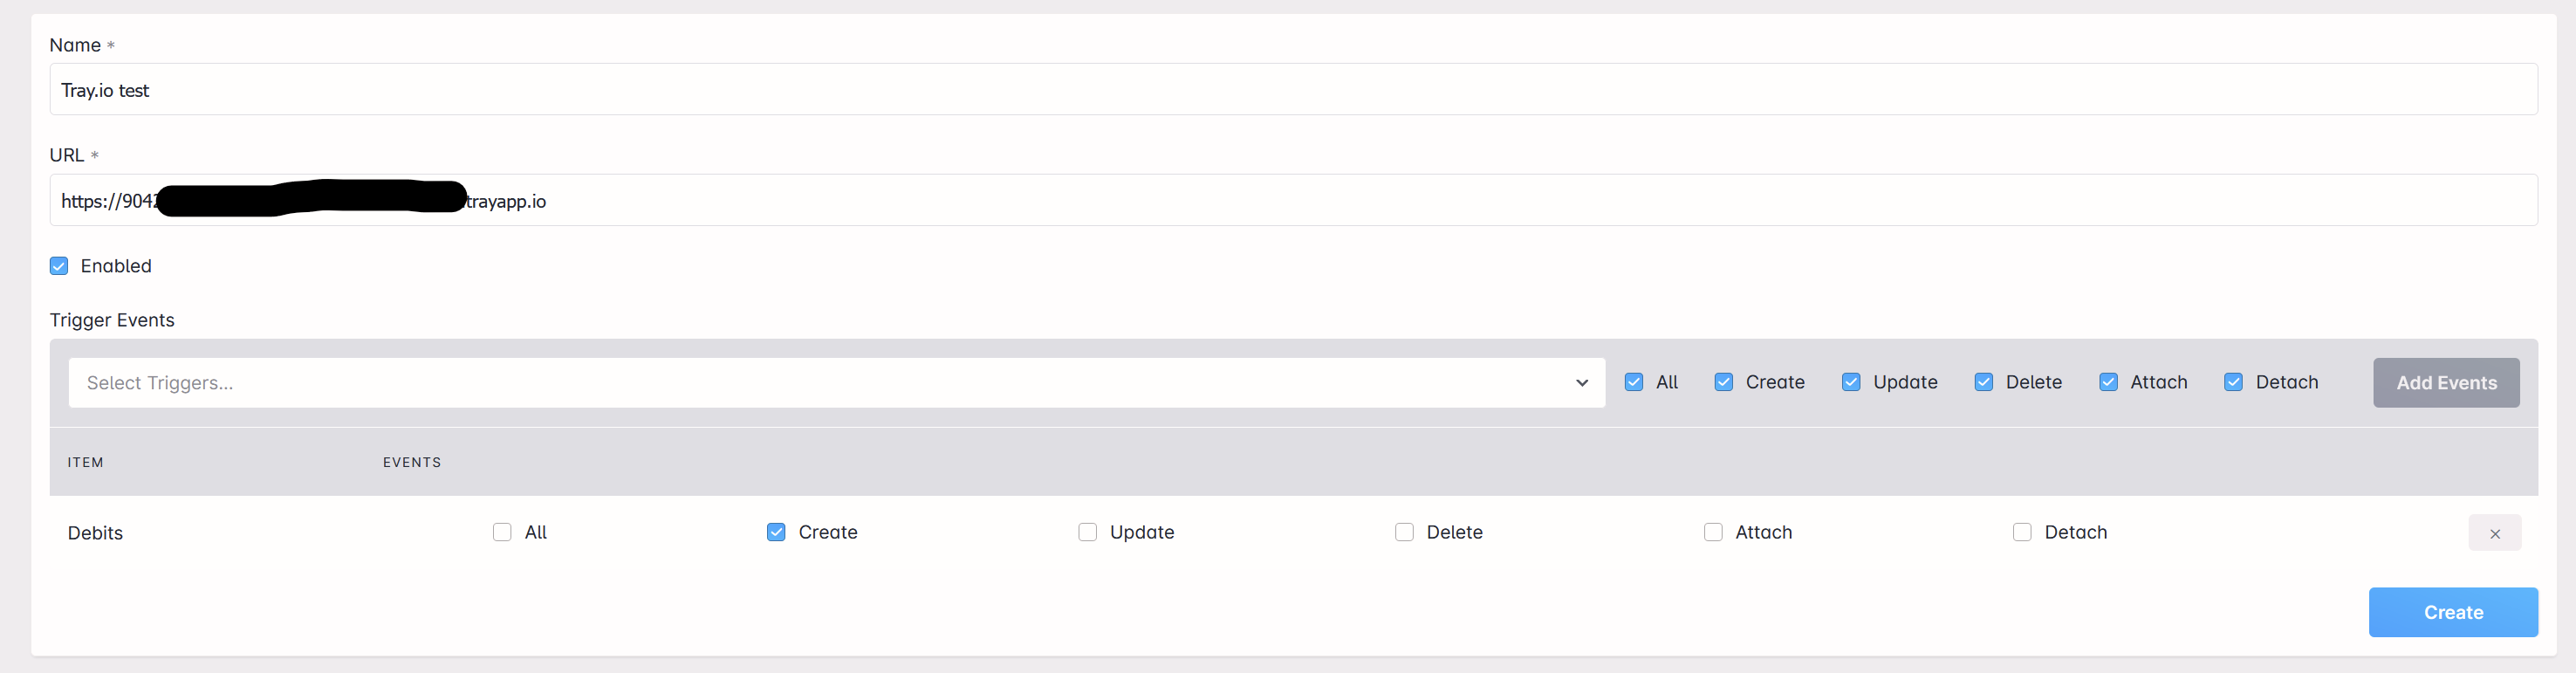
Create a webhook endpoint in Sonar and point it at the tray.io public webhook URL.
Before saving your webhook endpoint in Sonar, make sure you’ve clicked Enable Workflow at the bottom of the screen in tray.io, as Sonar will attempt to reach the public URL you provide as you create the endpoint.
Now that we’ve setup the webhook in Sonar, we can begin building out a workflow in tray.io to do something once the webhook is received. For the purpose of this demonstration, I’ll add the debits that are received to a Google Sheet, but tray.io integrates with all kinds of systems – you could post this data into Quickbooks, Netsuite, or any other connector that tray.io supports.
First, let’s start by triggering a webhook from Sonar into tray.io so we can look at the data we receive. Create a random debit in your Sonar system, and then navigate to tray.io. Click on the Logs button at the top of the screen, and you should see the attempt on the left. Click through it, select the Webhook step and you’ll get a view of the data that came in – it should look something like this.
The part we are really interested in is the body. Here, you can see all the data on the debit – the amount, the GL codes, and lots of other useful information. While viewing this data, click Use Output at the top of the window – this will make all this data easily available for our next step.
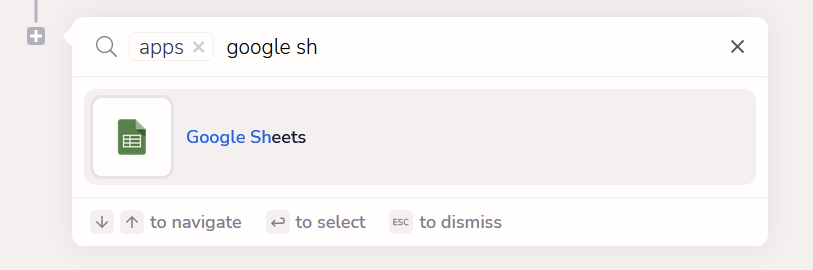
The next part can seem a little complicated, but once you understand the structure of the data, it should start to fall into place. What I’m going to do here is authorize tray.io to access my Google account, so that it can write to a spreadsheet of my choosing. First, click the [+] sign underneath the webhook in the main display of tray.io to add a new step. Choose Service Connectors and then search for Google Sheets.
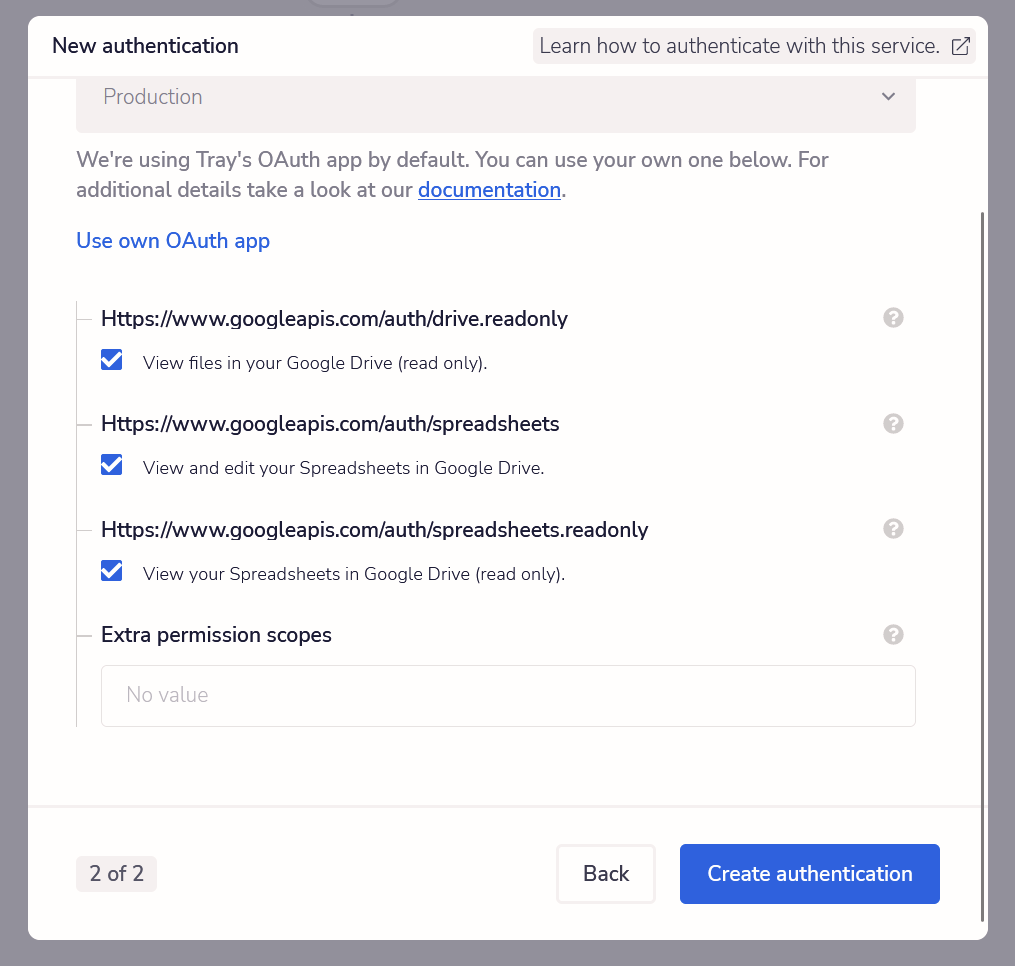
Select the Google Sheets option, then click on it in the main tray.io display. This will pop up a properties panel on the right side of the screen. Navigate to the Auth tab, click New Authentication, and then move through the steps to connect tray.io to your Google account.
Now that we’ve authorized tray.io to access your Google account, go to sheets.google.com and create a new spreadsheet. Look in the URL for the ID of the new spreadsheet.

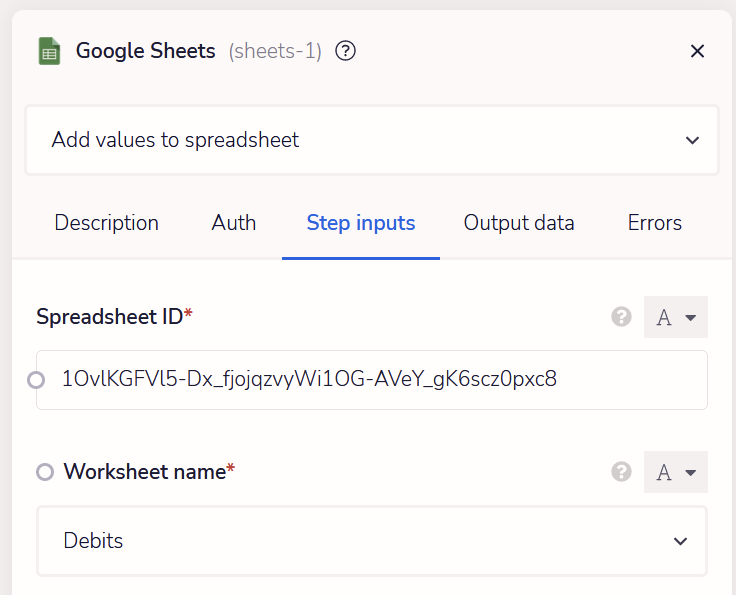
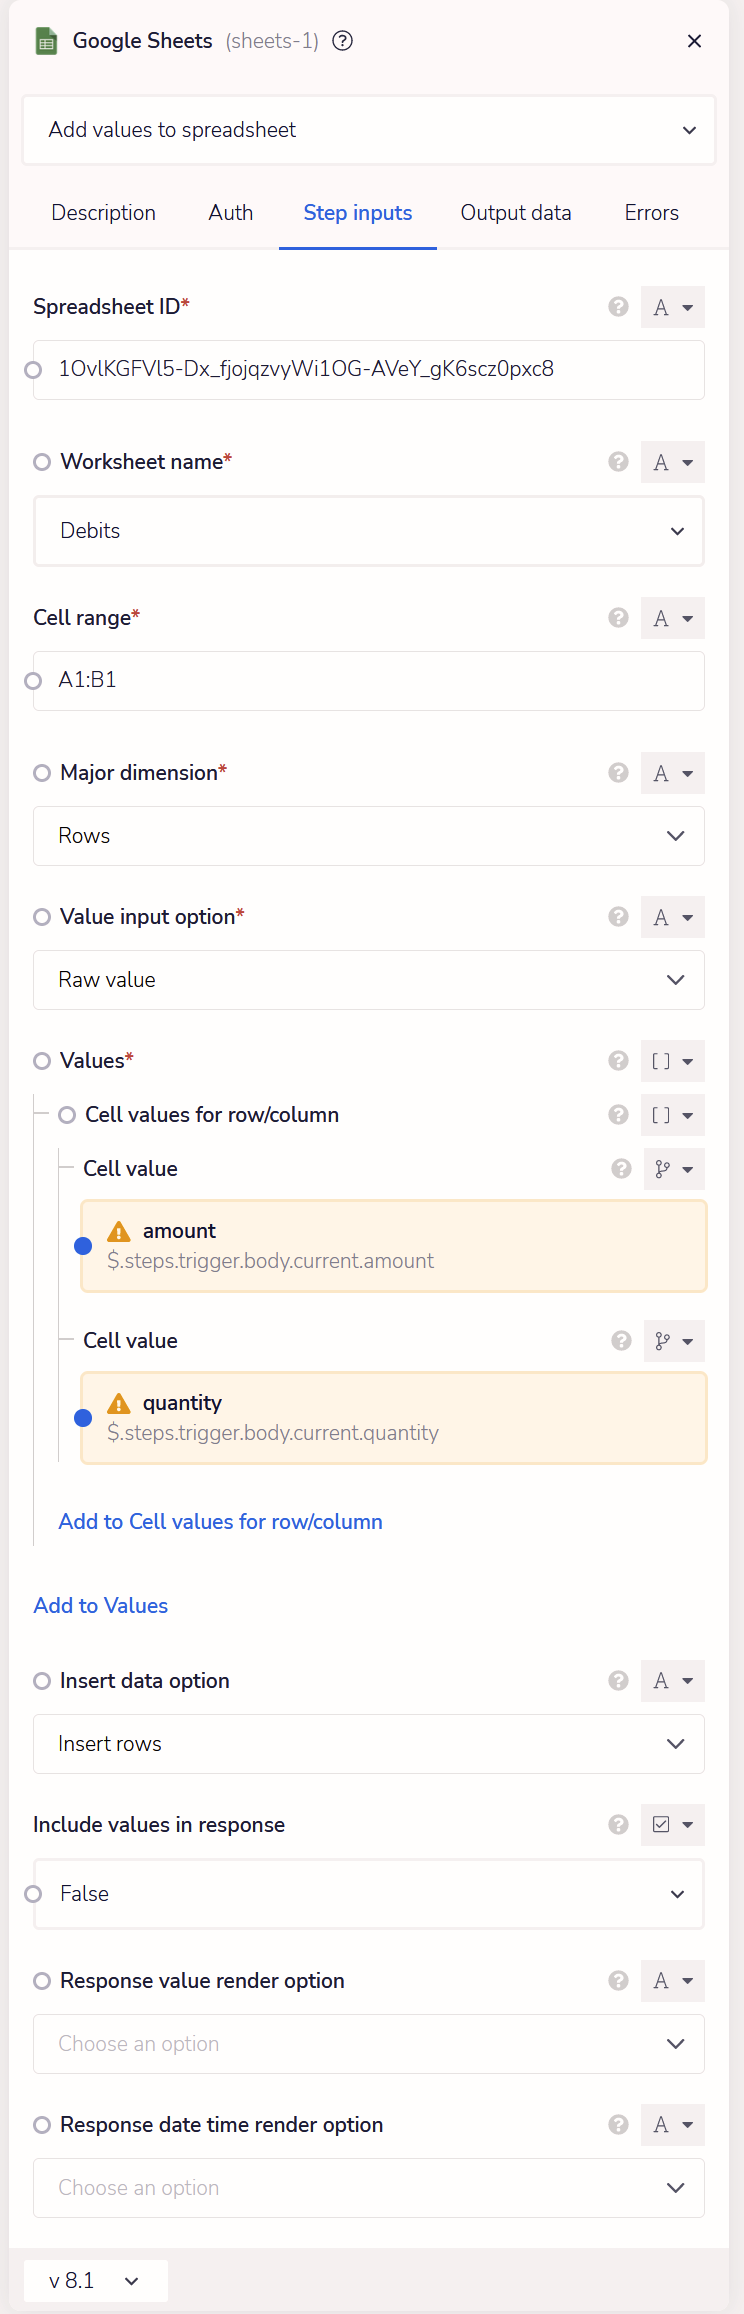
Go back to tray.io, click on the Step Inputs tab in the properties panel, and paste this spreadsheet ID into the Spreadsheet ID field. Now, if you click in the Worksheet Name drop down, you should see a list of the worksheets in this spreadsheet – you probably only have Sheet 1, but you can create other sheets, or rename your existing sheets – in my example, I named mine Debits.
Next, we need to decide what data we’re going to populate into the spreadsheet. For this example, I’m going to add the amount, and the quantity, but you can add as much or as little as you like. For this to work, we need to tell tray.io which cells to populate. Since this is a new spreadsheet, I want tray.io to start from the top, so in the Cell range field, I’m going to enter A1:B1. Since we’re entering two pieces of data, I’m using column A and column B, and starting in row 1. If you were entering three pieces of data, you could enter A1:C1, or if you wanted to start further down, you could enter A2:B2.
Next, for our Major Dimension I’m going to select Rows. This means tray.io will assume it needs to add a new row each time. For Value input option, you can leave Raw value as the selection. Now it’s time to reference our webhook data to populate actual information into Google Sheets.
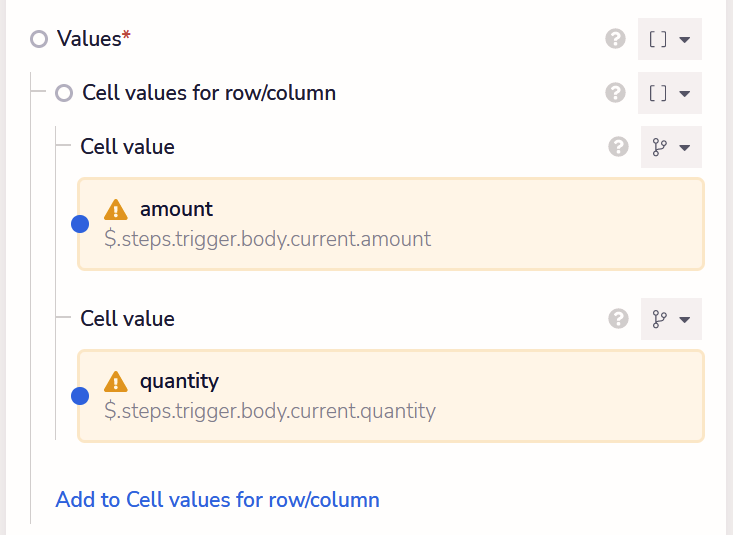
Take a look at my configuration above to understand the steps to get data posted in – I’ll walk you through each piece. For Values, I clicked the dropdown to the right and selected array. This means that I’m going to post multiple pieces of data – an array is just a term that means a collection of items.
Next, click Add to values and you’ll get a new line titled Cell values for row/column. Again, set this to an array – we want to populate multiple cells (one for the amount, one for quantity.) Click Add to cell values for row/column and you’ll now see a Cell value option. In this case, click the dropdown on the right and select jsonpath. JSON (JavaScript Object Notation) is the format that data is received in from the Sonar webhook, so selecting jsonpath lets use define a path through the data to select the actual value we want. Click in the field that says Click to map data and search for amount – you should find $.steps.trigger.body.current.amount. If you look back at the structure of the data I posted above, you’ll see that there is a property named body, which has a property below it named current, and finally a property named amount – that is what we’re referencing here. The $.steps.trigger part is telling tray.io that we’re fetching the data from one of the steps in the workflow, and that step is the trigger – the webhook we added. Don’t worry if this seems complex to you right now – just know that this path data is autopopulated because we clicked Use Output earlier, and you just need to be able to find the underlying value you want for right now – in this case, amount.
Now we’re going to do this again for the quantity. Click Add to Cell values for row/column, and do exactly what we just did, except this time, search for quantity. You should find $.steps.trigger.body.current.quantity.
Finally, underneath this section, set Insert data option to Insert rows. This tells tray.io to insert a new row each time this webhook comes in. Once you’re done, the properties panel should look something like this.
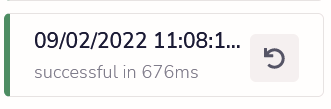
Now, this is a very simple flow. We’re just receiving the webhook, and taking out some of the data to send to Google Sheets. What’s powerful about tray.io is that we can do all kinds of things from here – we could take the output back from Google Sheets and send it elsewhere, or we could have a conditional step that sends it to Google Sheets if the quantity is greater than 1, and sends it elsewhere if it’s 1. Before we get too far though, let’s make sure this works. Click on Logs at the top of the screen, and check out the output on the left side. If you click the circle arrow icon next to the webhook we received previously, we can rerun the webhook and see what happens.
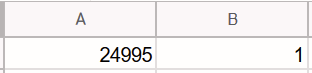
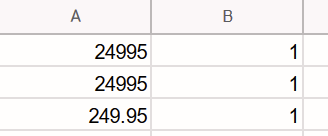
You should see the workflow run successfully. Now navigate to your spreadsheet and you’ll see the data sitting in row 1, since we told tray.io to start at A1:B1.
Run it again, and you’ll see the same data populated in row 2, as we told tray.io to Insert rows for our Insert data option, and it’s smart enough to know there’s already data in A1:B1 and move to A2:B2.
Congratulations, you now have data flowing into Google Sheets automatically! However, you probably noticed that the amount in the Sonar webhook is in cents – the 24995 value shown above is really $249.95. We could format this with a formula in Google Sheets, but we can also use a helper tool in tray.io to format it for us. Click the [+] icon in between our Webhook trigger and our Google Sheet connector and this time, go into Helpers and search for Math Helper. Next, click on the Math Helper in the workflow, and navigate to Step Inputs.
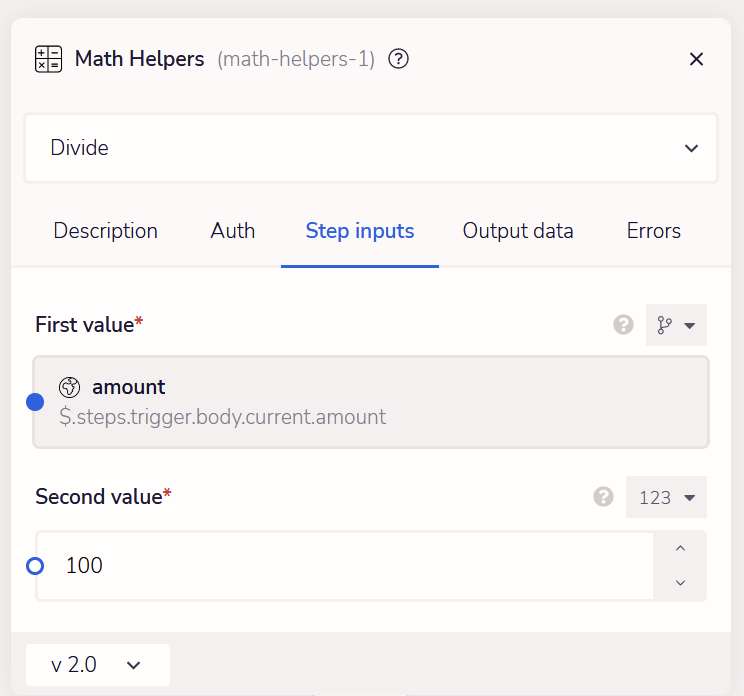
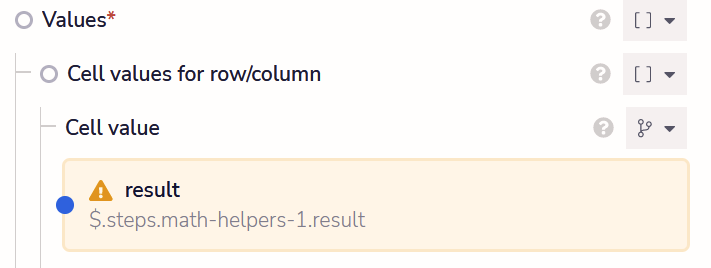
Set the operation at the top to Divide, the First value to $.steps.trigger.body.current.amount, and the Second value to 100. This tells tray.io to take the amount, and Divide it by 100, giving us our value in dollars. Next, go to Output data and click Copy path next to the result.
Finally, click on our Google Sheets connector, go to Step inputs, and modify the Cell value that is selecting the amount from the trigger, and replace it with the path you just copied. It should look something like this.
Finally, click Logs at the top of the screen again, and rerun the webhook. You should see it complete successfully, and now your spreadsheet will contain a third row, with the value in dollars and cents.
This is only just scratching the surface of what you can do with tray.io and Sonar, but hopefully this gives you a starting point. We don’t have an official partnership with tray.io, but I think it’s a great tool, and I’d encourage you to reach out to them if you need help – they have a good onboarding process, and professional services available to help you if you get stuck.
Happy automating!